FTK IMAGER NEDİR, KURULUMU VE İMAJ ALMA
In this article, I will walk you, my valued readers, through the installation of FTK IMAGER, an important imaging tool used in Digital Forensics, and the…

Hello everyone :)
In this article, I will walk you, my valued readers, through the installation of FTK IMAGER, an important imaging tool used in Digital Forensics, as well as the methods for acquiring an image with it.
In this article, you will learn the following, in order;
- What is an image?
- Installing FTK IMAGER (with screenshots).
- Acquiring an image file with FTK IMAGER.
What is an image?
Imaging refers to the process of backing up (archiving) all of a computer’s or a storage device’s drives at a given point in time using a program.
Typically, programs are installed after a fresh format, and an image (copy) of these programs is taken. These copies can be saved to the D:/ drive or to a flash drive.
We’ll continue our article by using the FTK IMAGER program to acquire an image.
Installing FTK IMAGER?
FTK IMAGER is one of the most widely used, internationally recognized software tools for forensic imaging operations. There are multiple versions of the FTK IMAGER software. To download it, you can go to https://accessdata.com/product-download and download FTK IMAGER; by the way, FTK IMAGER is free.
Like most other programs, it has a simple installation process. We start the installation by double-clicking the exe file we downloaded.
- We click “Next” through the first screen. We complete the installation by clicking “next” and then “finish” on the following screens.


Acquiring a Disk Image?
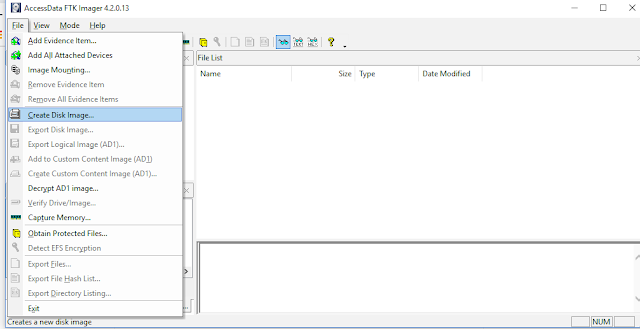
First, we open the FTK IMAGER program we installed. After opening the program, we select Create Disk Image from the file menu.
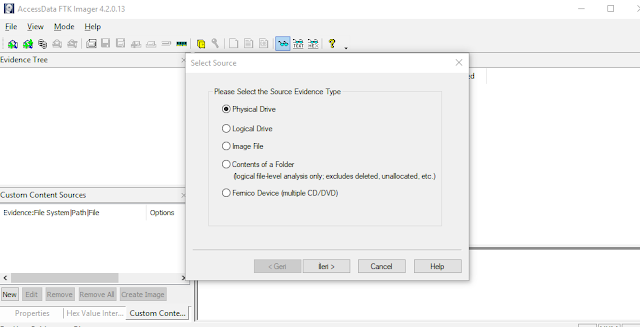
Next, an option for how the disk image should be acquired will appear. Although there are multiple options, selecting Physical Drive will be the most correct choice.
Since I only have a C drive, only one option appeared for me, but you may see multiple disk options and can select the one you want.
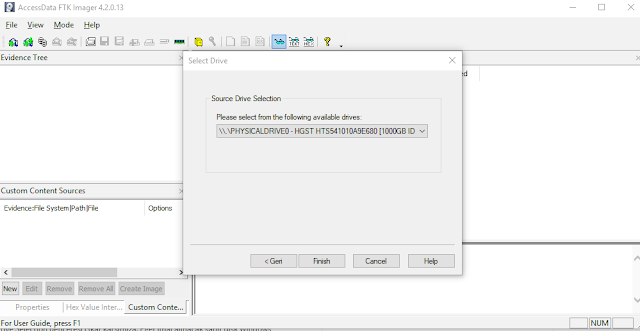
After clicking Finish, a window showing where the disk will be saved will appear, and this time we get:
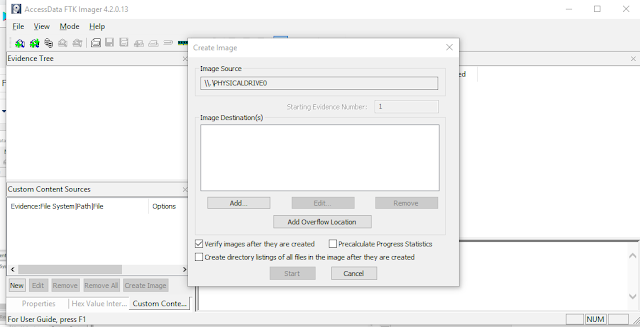
Here you select the appropriate format and continue; I’ll select the raw format.
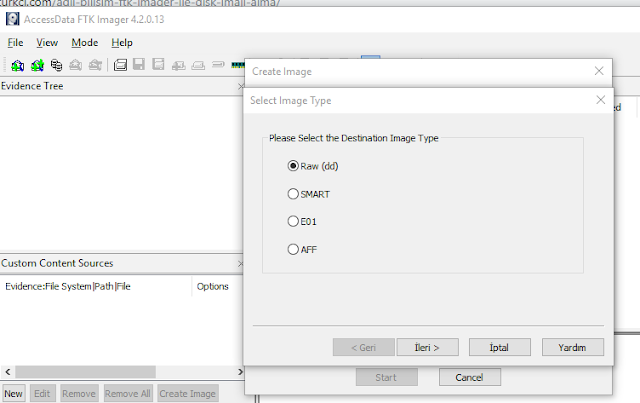
Clicking Next opens the following window: here it asks us to enter some information, so we quickly fill it in without dwelling on it and move on.
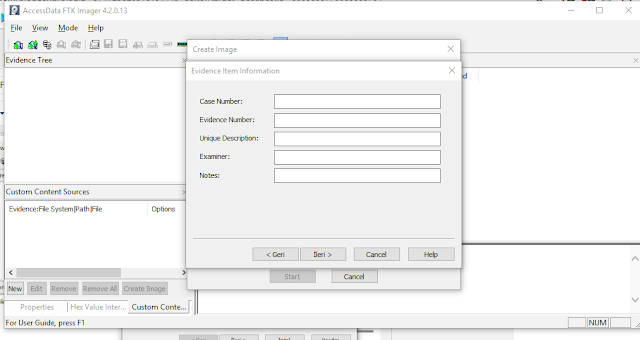
In the next window, we’ll specify where the image file will be written. What matters here is that it’s better to write your image out to a CD or a USB drive.
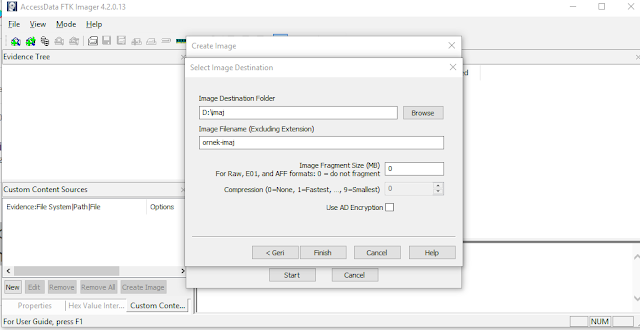
I chose to save it to my USB drive as an image file named ornek-imaj.
We click Finish.
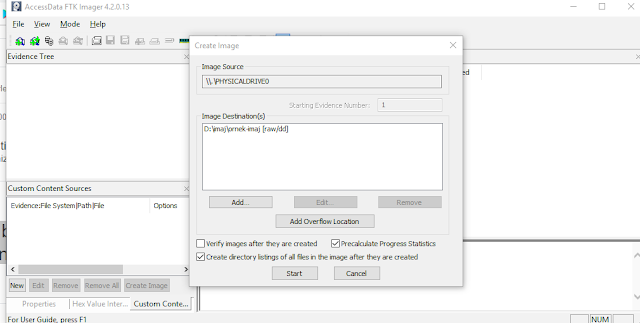
And we start the imaging process by clicking the “start” button.
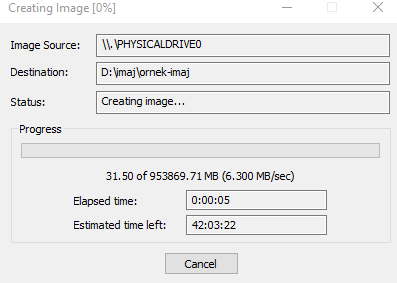
Above, it indicates that the imaging process will take 42 minutes and 3 seconds.
When the imaging process finishes, an “Image Summary” button will appear. When you click it, you can see summary information about the imaging process.