Hiding and Analyzing Text Inside Audio Files Using the "Steganography" Method
As you can tell from the title, in this article we'll create an audio file. Inside this audio file, we'll hide a piece of text we've chosen using the "steganography" method.…

Hello everyone, as you can tell from the title, in this article we’ll create an audio file. We’ll hide a piece of text we’ve chosen inside this audio file using the “steganography” method. Finally, we’ll analyze the content of this audio file to try to find the hidden text. Happy reading in advance. :)
Steganography
First, let’s briefly explain this term. Steganography is the practice of deliberately hiding data inside image, audio, or video files in the form of periodic distortions.
1) Hiding Text Inside an Audio File with “Coagula”
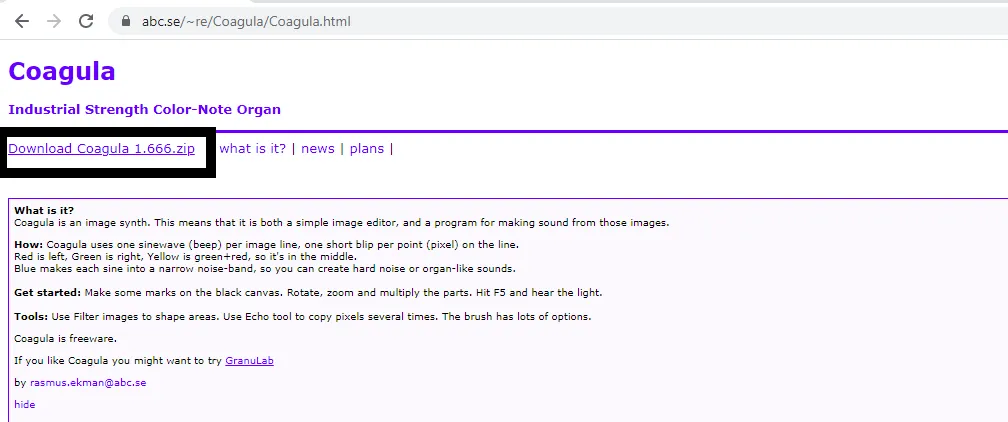
Before we start, you need to download the “Coagula” program from this link and complete the necessary installation on your system. I downloaded this program onto my system and completed the installation.
- At first, you’ll come across a web page like the one below. You can download it from the link inside the box, and the installation is completed very simply.
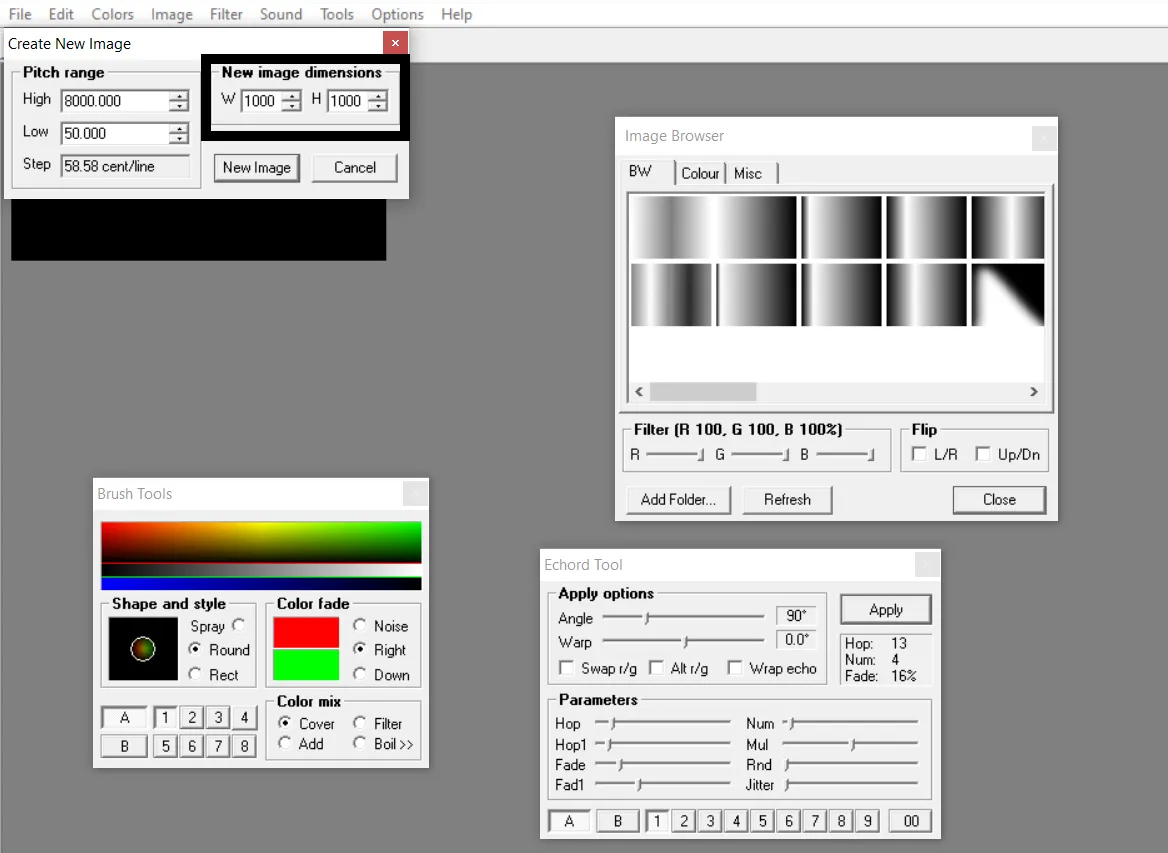
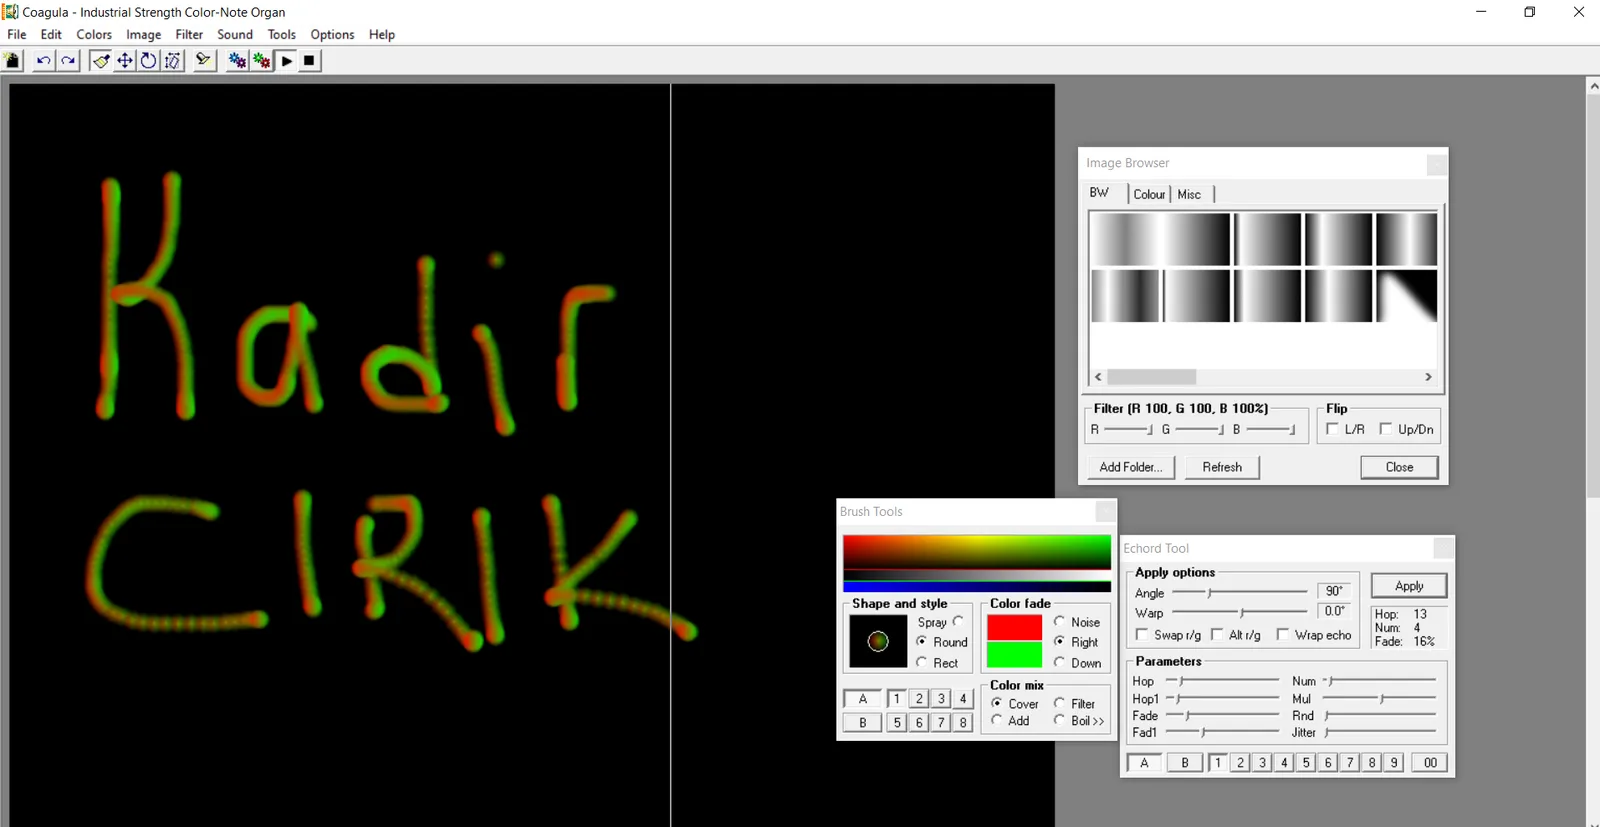
- When the program is first opened, we’re greeted by an interface like the following. The first thing to do here is to change the dimensions as you like, from the FILE > NEW IMAGE option. In this part, I set both the width and height to 1000.
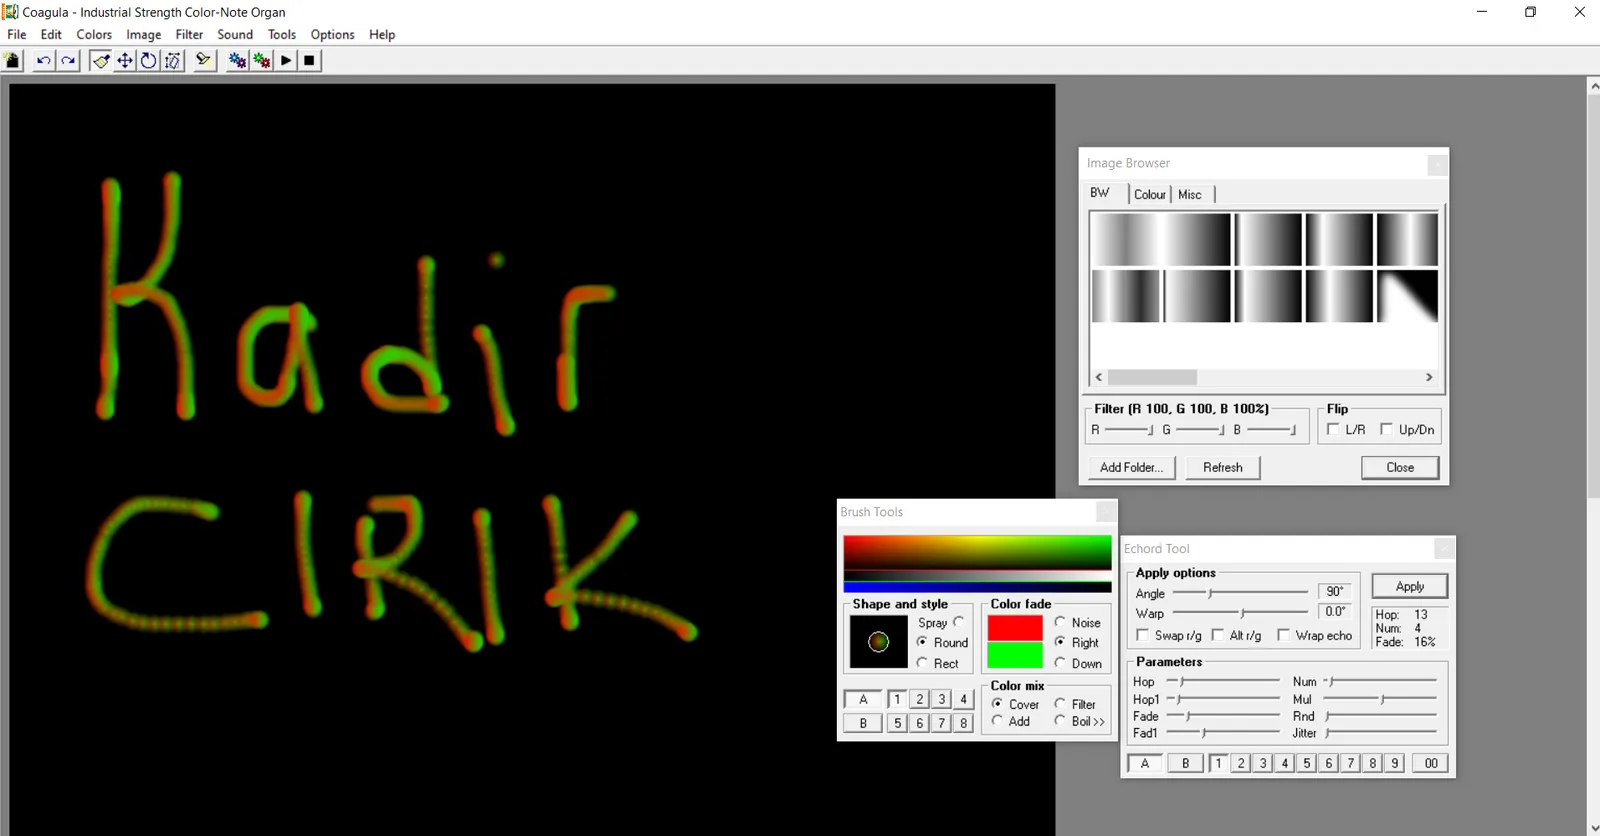
- Right after that, you can write the text you want to hide with the help of the mouse. As an example, I wrote my own first and last name.
- After writing the text we want to hide, when we click the option inside the box, our text will be converted into sound. At the same time, while your text is being converted into sound, you’ll hear another sound in the background. This means your text is being turned into sound.
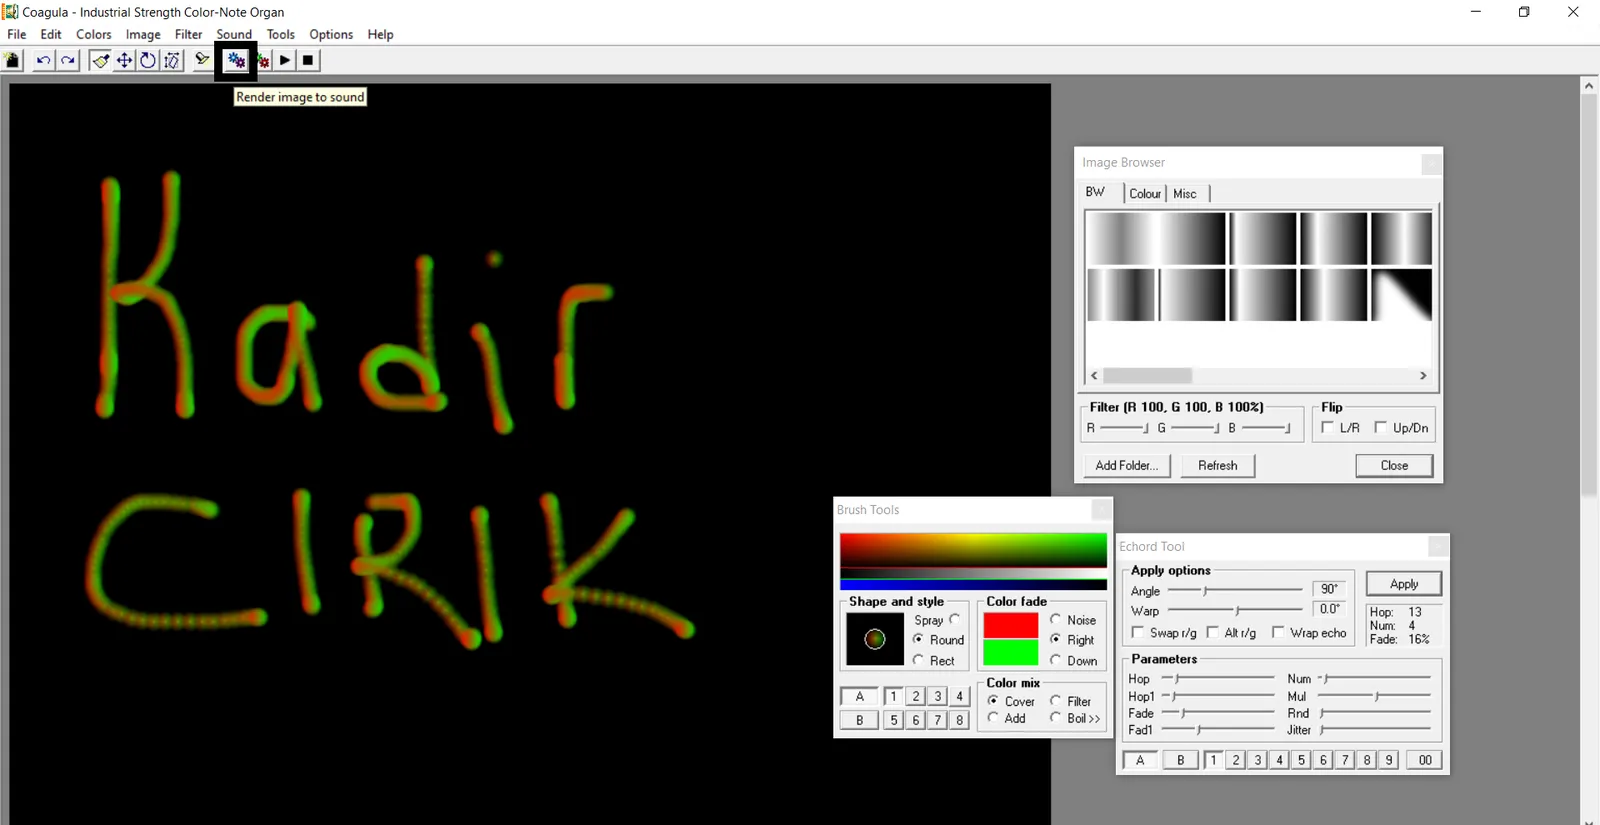
- This is the image of a vertical line that moves from left to right, allowing our text to be picked up as it’s converted into sound.
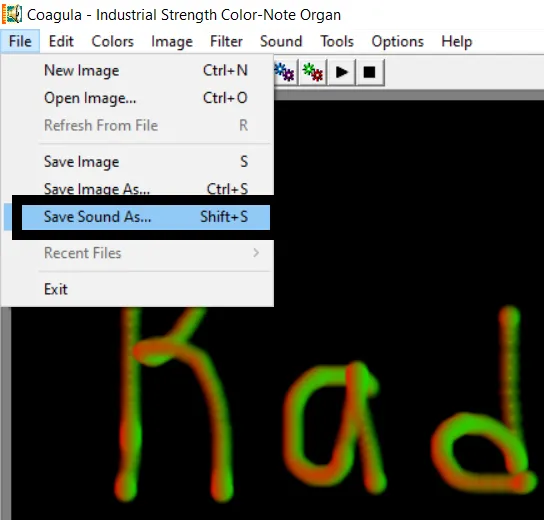
- This way, our text is now embedded inside our audio file. To save this audio file, it’s saved to the location we want using the File > Save Sound As option.
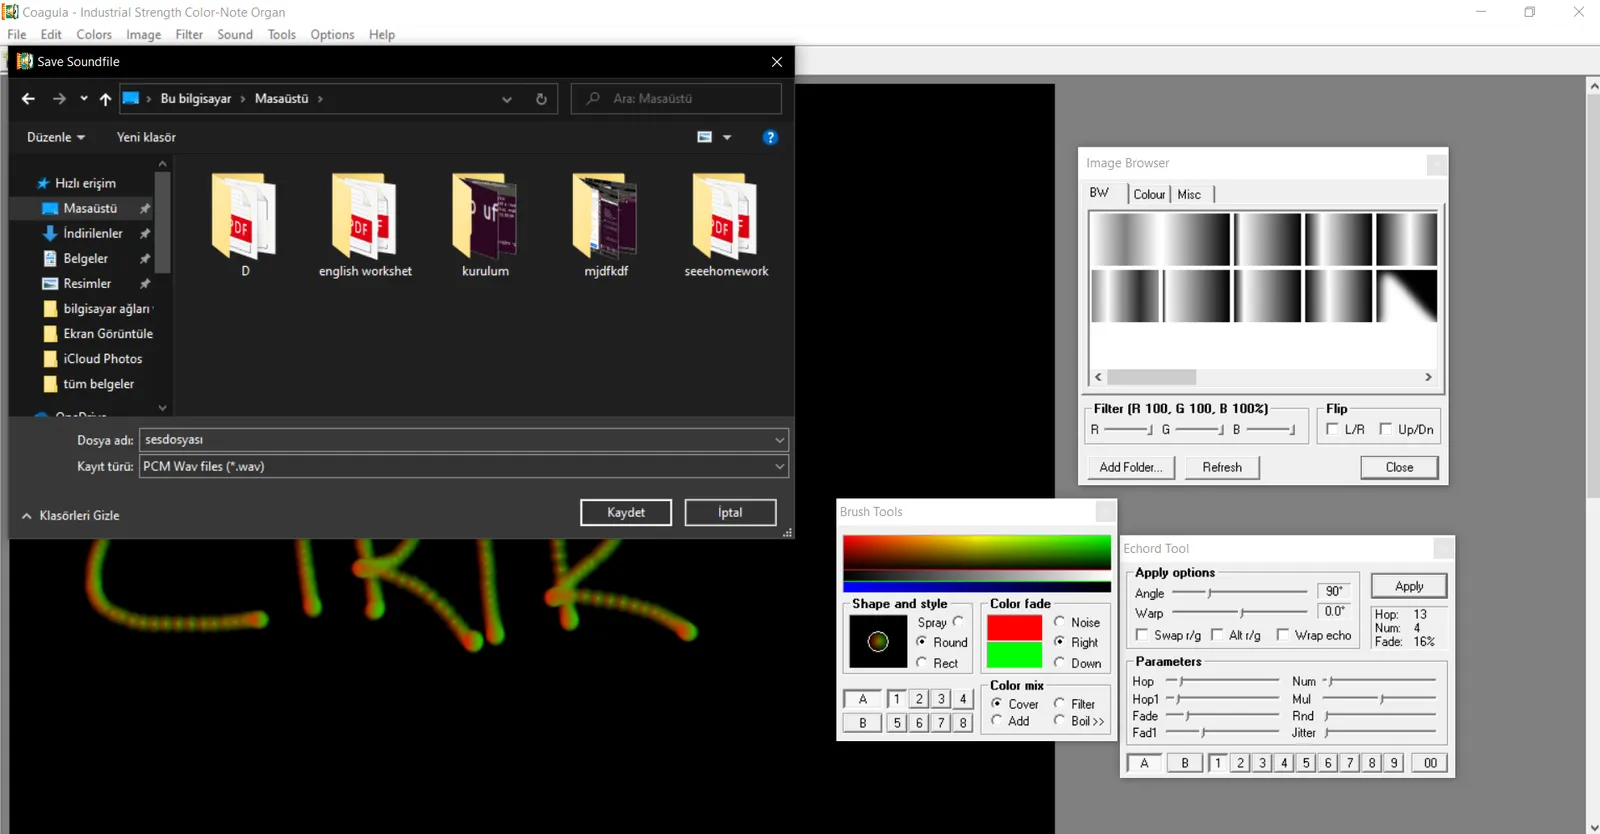
- As shown in the image, I saved our audio file to my desktop under the name sesdosyası.wav. The program itself already saves files with the .wav extension, which is an audio file format.
2) Analyzing the Text Recorded Inside the Audio File
In this section, we’ll analyze what the text we recorded inside the audio file with the Coagula program actually is. You can get to our other program, “Sonic Visualiser”, by clicking this link. You can then download and install this program as well.
- First, we open the audio file we saved earlier in our program by clicking the File > Open option.
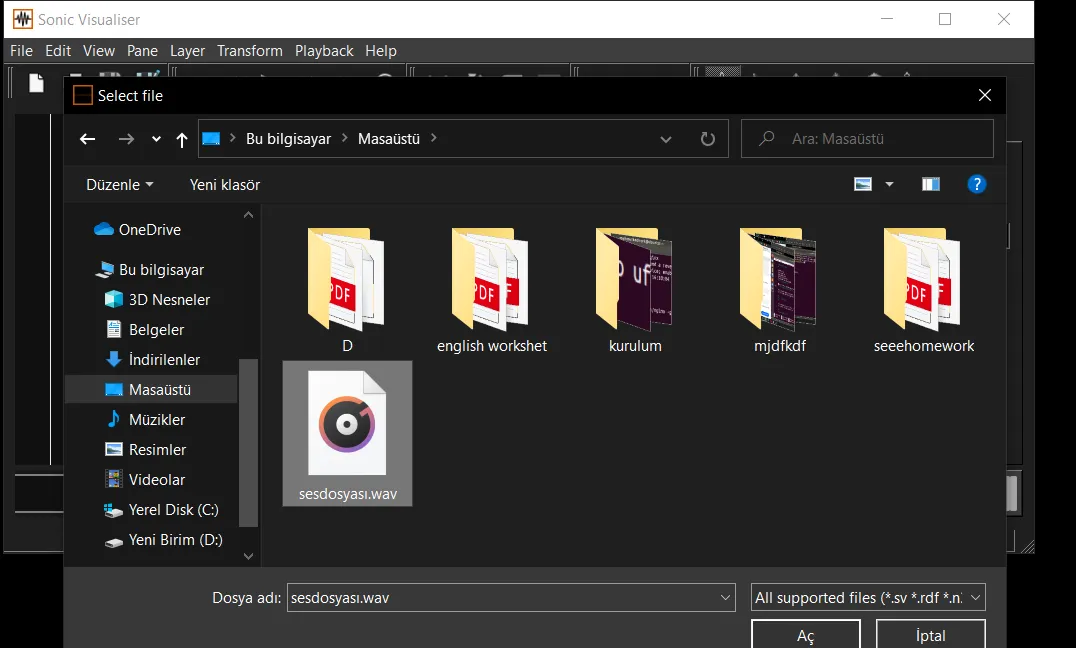
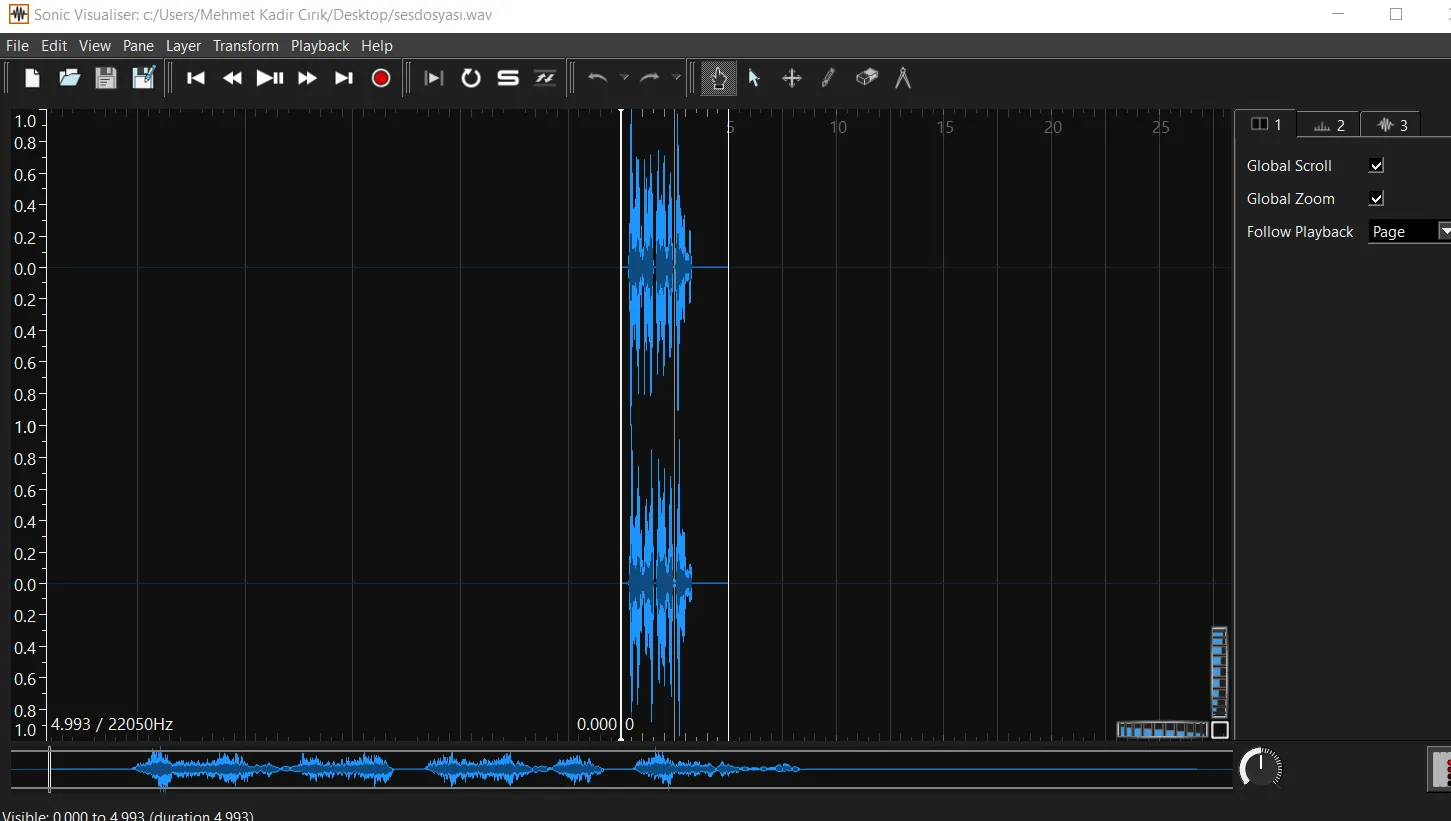
- We can first see the content of the audio file we opened like this. Since the frequencies are very densely packed here, it looks quite complex to us.
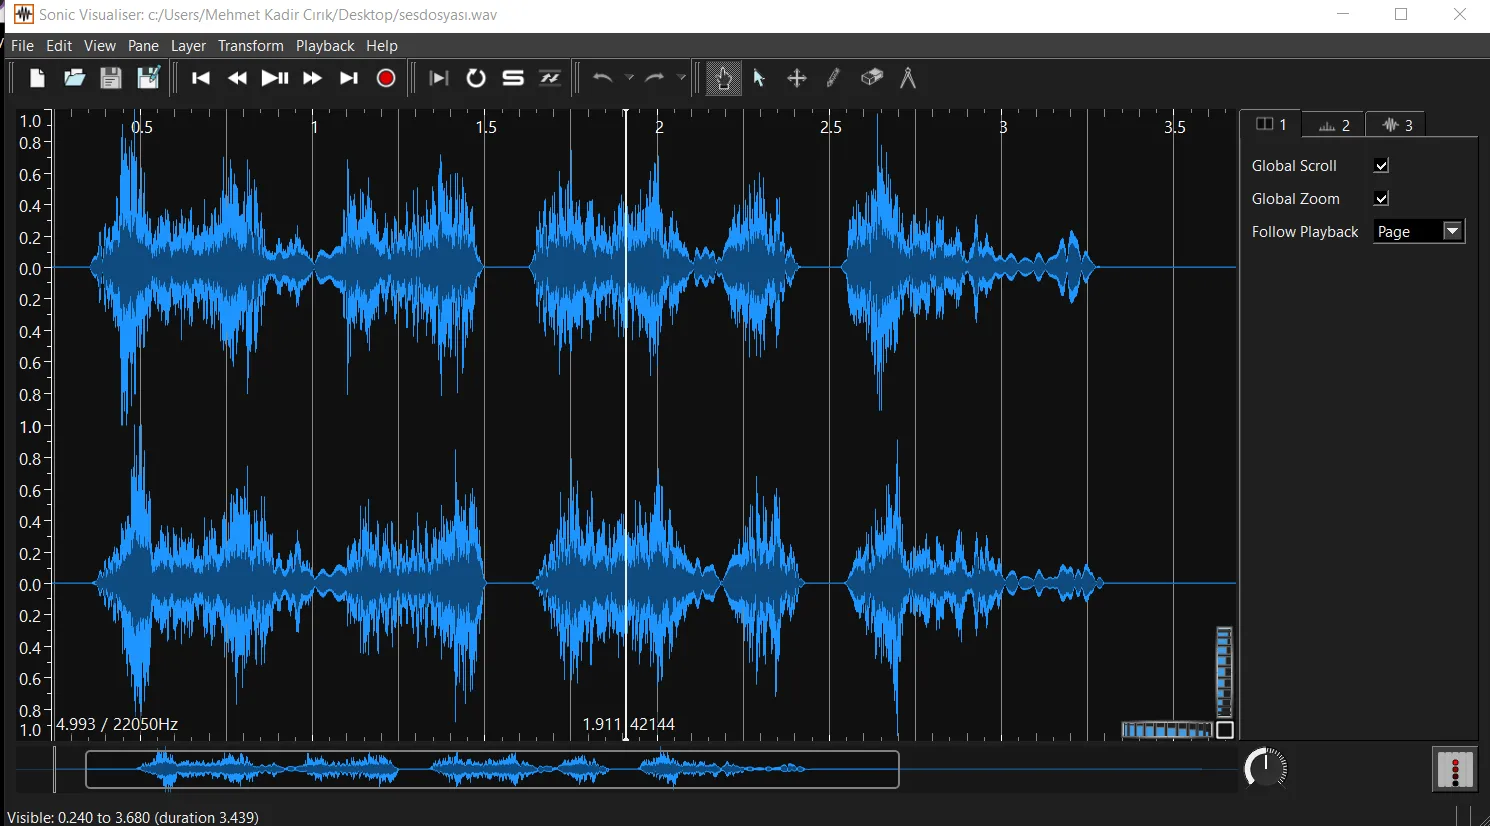
- In this image, to see the densely packed frequency above in more detail, we scrolled our mouse wheel upward. This made the dense frequency data much clearer.
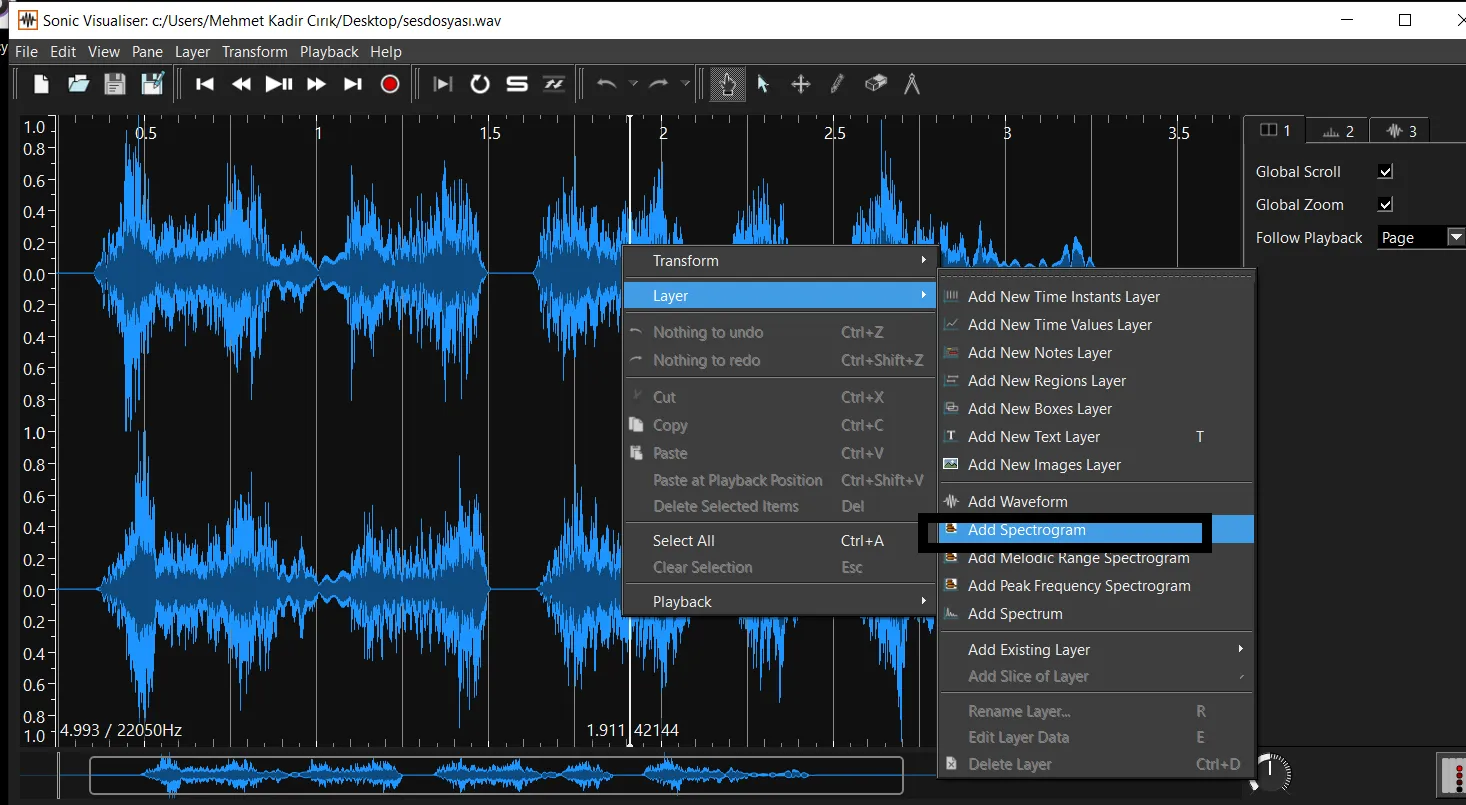
- To reach the hidden text within the frequency, we click Right Click > Layer > Add Spectrogram, as shown in the image.
- After completing this final step, we were able to reach the text we had hidden inside the audio file, as shown here.
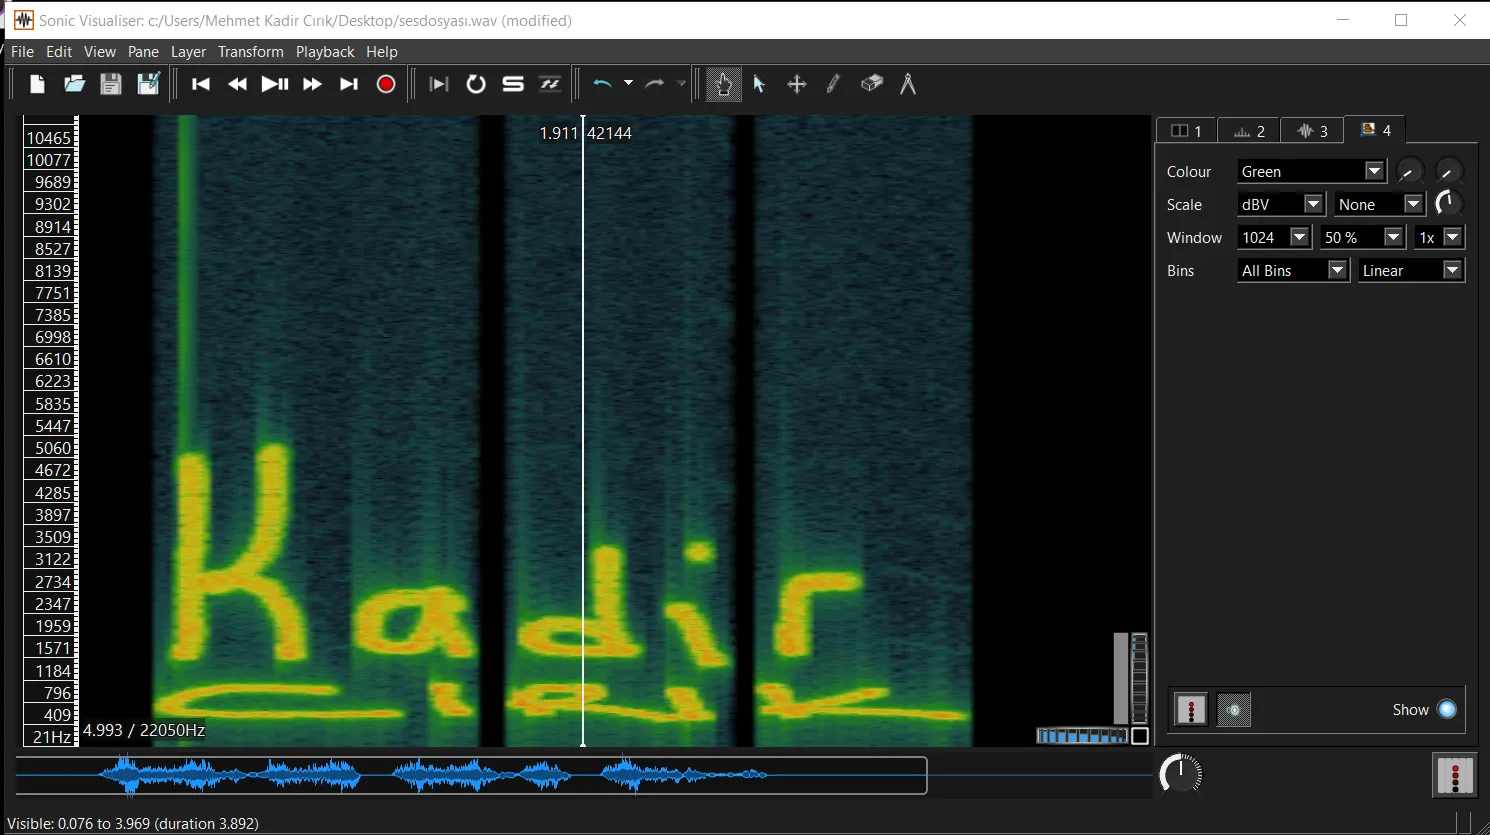
In conclusion, we hid a piece of text of our choosing inside an audio file using the Steganography method. We then analyzed this audio file, and as a result of our analysis, we were able to retrieve the hidden text.
Thank you for reading this far. :)