Installing and Configuring Active Directory and Domain Controller on Windows Server 2016
In this article, I'll try to walk you step by step through installing and configuring Active Directory and Domain Controller on Windows Server 2016. To better…

Hello everyone. :)
In this article, I’ll try to walk you step by step through installing and configuring Active Directory and Domain Controller on Windows Server 2016. To better understand the concepts here, you can check out my other article from this link.
The minimum system requirements for the installation are as follows; CPU: 1.4 GHz x64 RAM: 2GB HDD: 32GB We also need to configure a static IP, host name, and run server updates before we begin.
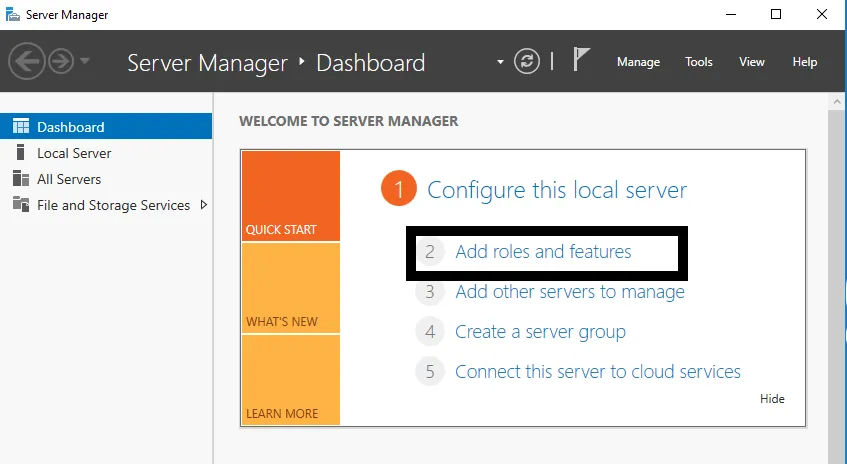
- First, I’ll click the “Add rules and features” option in the box to install the Active Directory role on this server, promoting it to a Domain Controller. While doing this, I’ll also create a Domain.
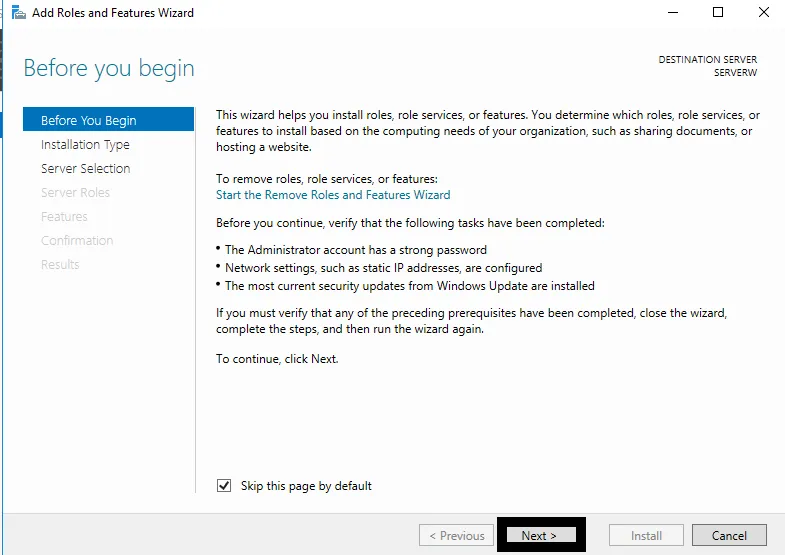
- This takes us to a panel before we begin and gives us some warnings about what we need to do here. One important warning here is that it wants us to make sure the IP address is set statically. You should also assign your IP address statically.
- Then we click “next” to continue.
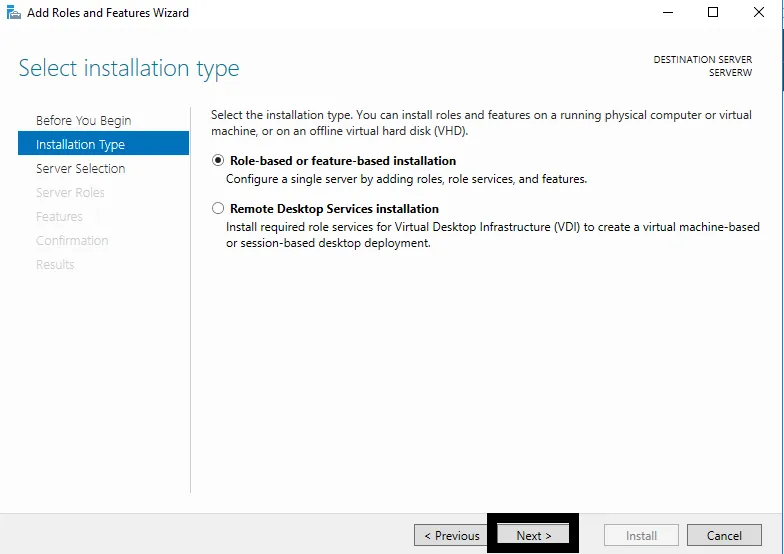
- Here we’re presented with 2 options. These are,
Role-based or feature-based installation, and Remote installation.
- We proceed by selecting the first option so that we can add and remove roles and features as needed, based on the edition we have of Windows Server 2016.
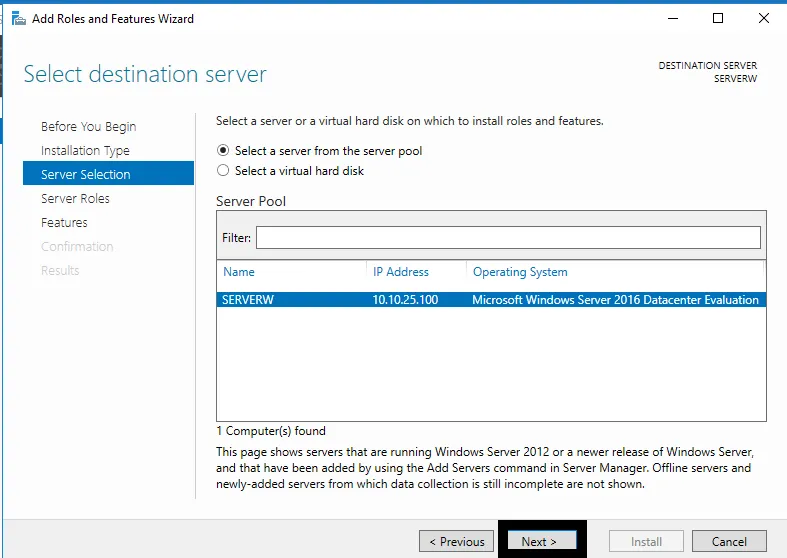
- Here there’s a “Server Selection” option. If we had a server pool, we’d be able to see all the servers here. However, we only have one server, so we select it and continue.
- In this section, we need to add whichever role we want to add to our server. Since we’re going to install the Active Directory role on our server here, we select this role and proceed.
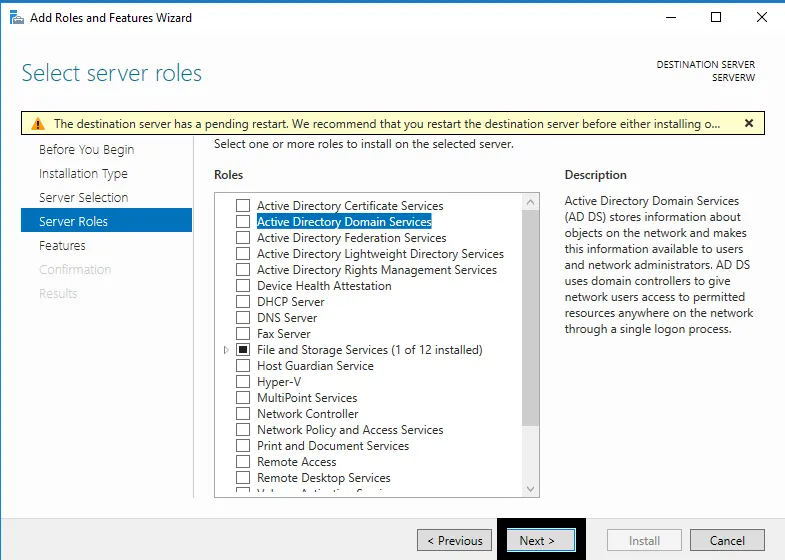
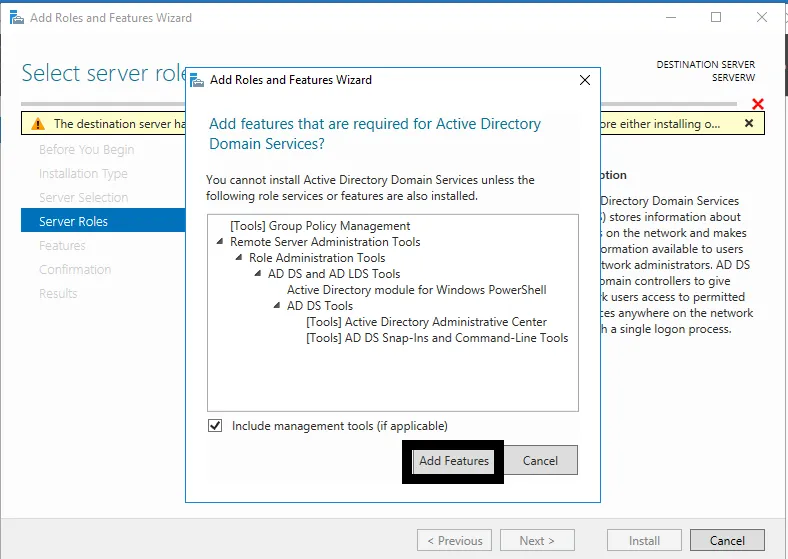
- After clicking the option above, it tells us about the requirements for this role. We click the “Add Features” option to add these.
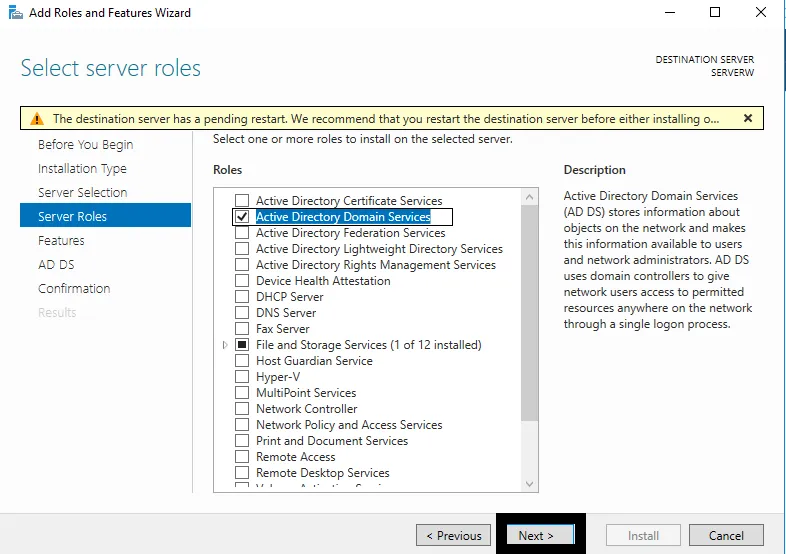
- Here we’re shown our selected role, already checked. We continue by clicking Next.
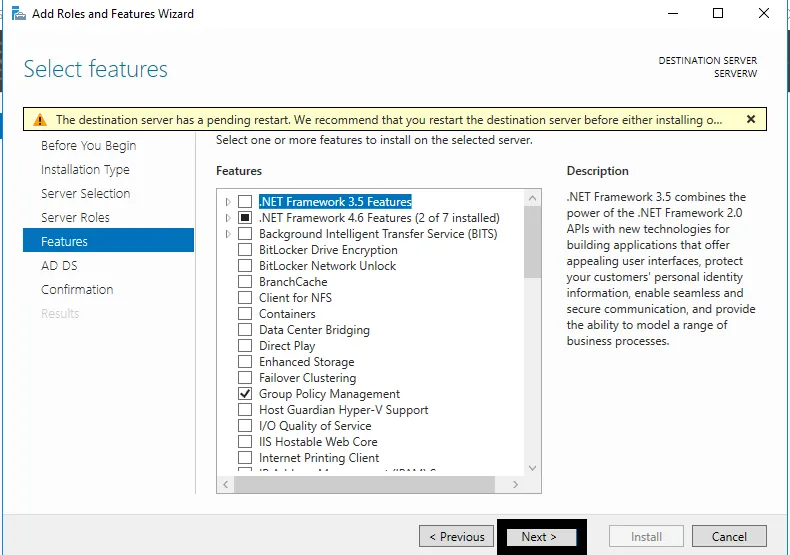
- On this screen, we encounter the feature-selection screen. The .Net and Group Policy Management features we need are already added by default. We had already approved these features above. So we move past this section.
- Our selections so far appear on this screen. We click Next.
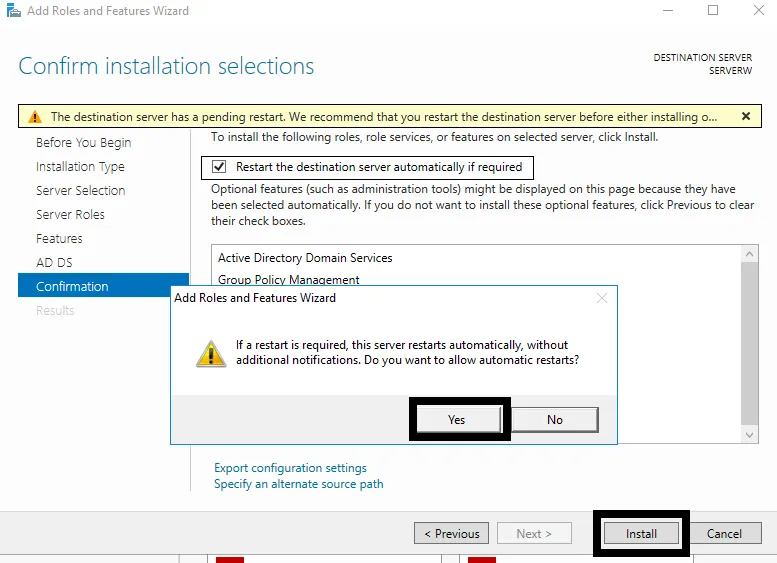
- After the role installation, there’s an option asking whether to “restart” if needed. After selecting this option, we click “Yes.” And we click the “Install” option to begin our installation.
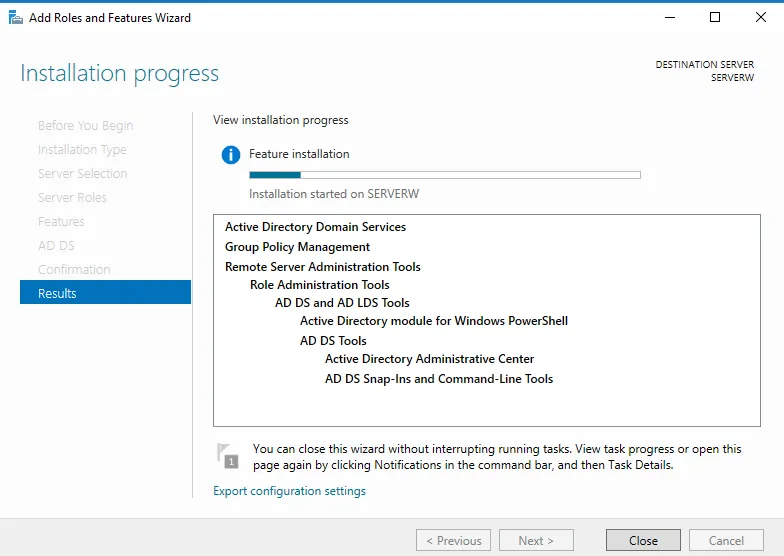
- The installation has now started. We can close this window using the “Close” option if we want.
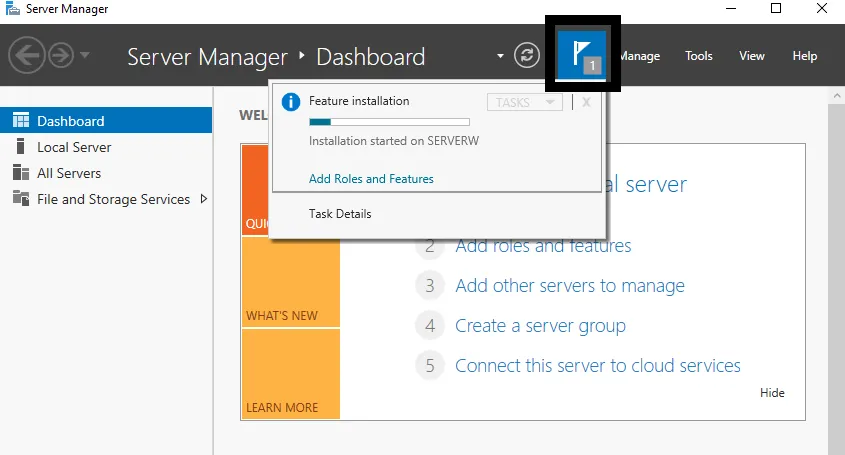
- If you click Close at the top, you can monitor the installation via the flag icon here. Nothing will go wrong.
- Our operation is complete. However, so far we’ve only installed the role. From this point on, we still need to configure it.
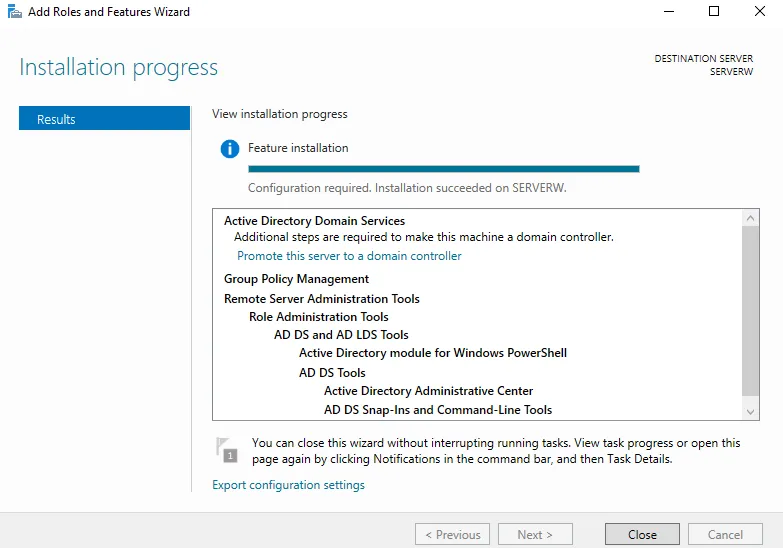
- Here you can see that the role has been installed.
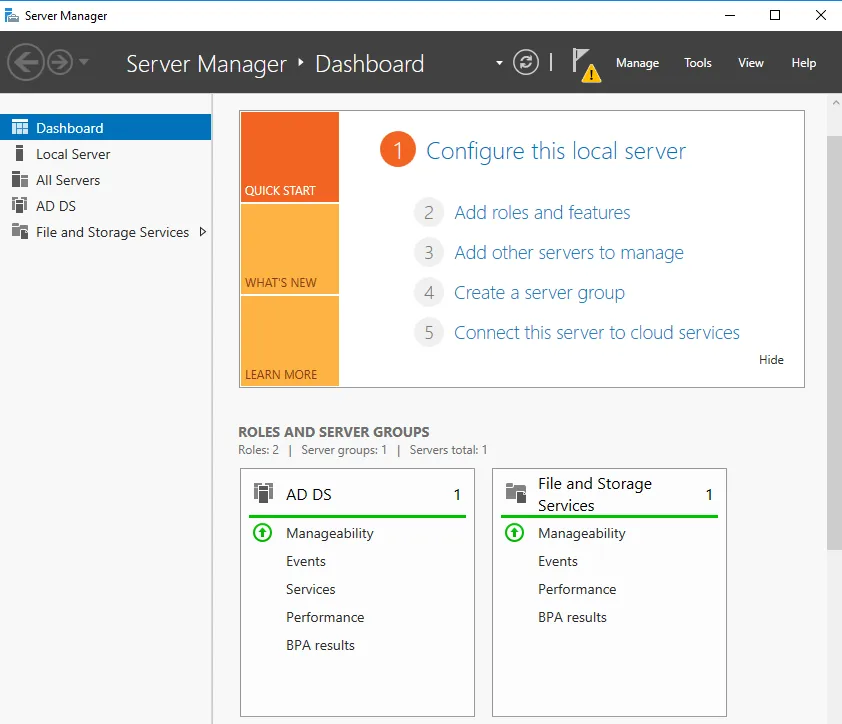
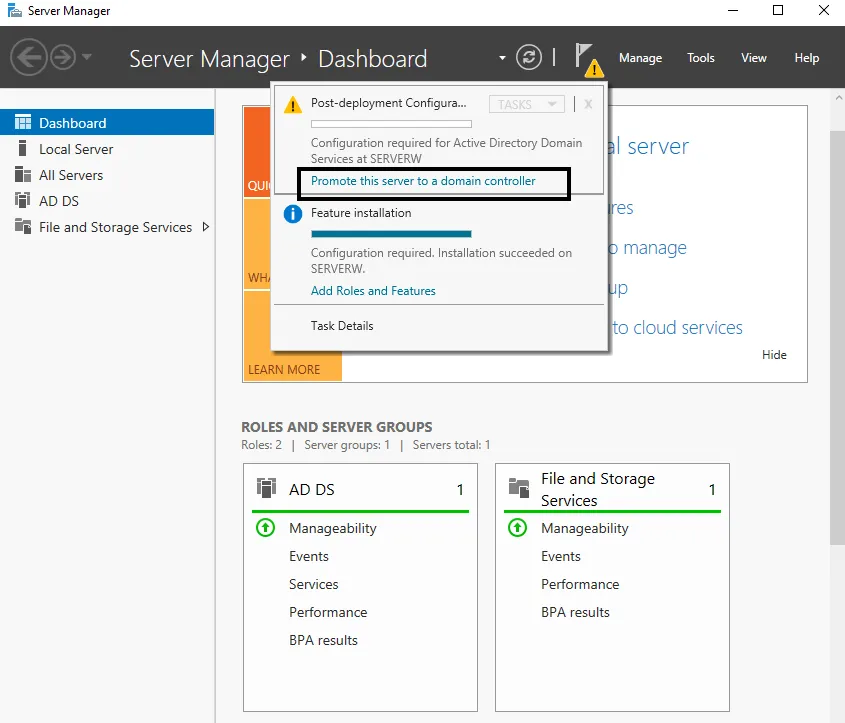
- To move on to configuration, we click the option shown under pending tasks below the flag icon.
- Here the system essentially tells us the following. “You installed the Active Directory role. Active Directory is a tool used by a Domain Controller, but you don’t have a Domain Controller. And you need to promote this to Domain Controller level,” it explains, more or less.
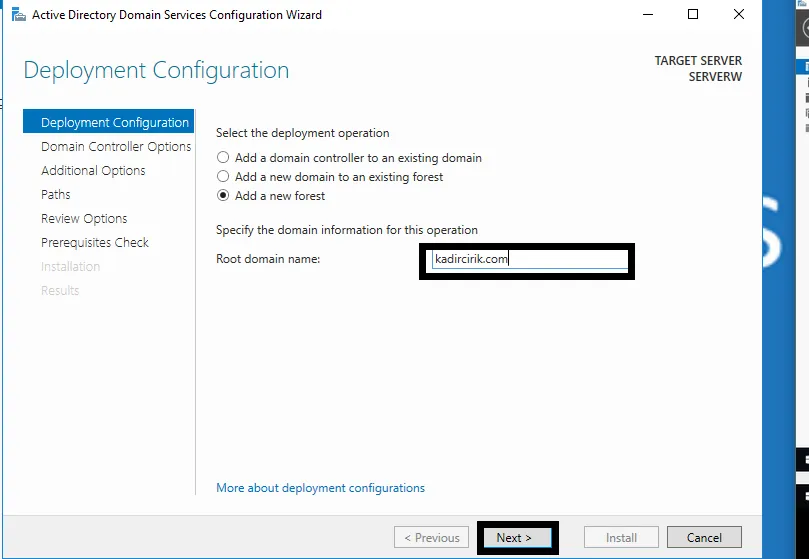
- Here it states that we need to set up a Domain before setting up a Domain Controller.
- Since we’re setting up a Domain for the first time, we check the “Add a new forest” option.
- We give our domain name. This consists of two parts: the “domain name” and its “extension.” I entered “kadircirik.com”; if you’ll be working locally, you can configure it with a .local extension.
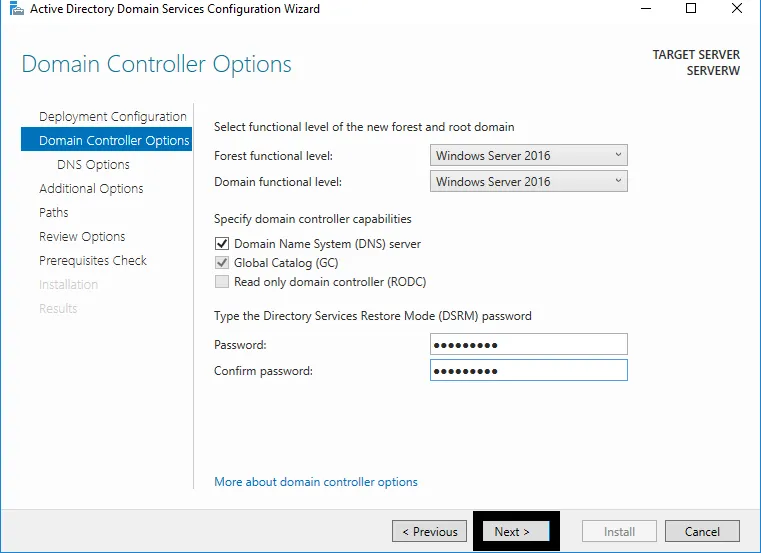
- Here we need to set the functional level of the forest and domain. In other words, if there are machines older than Windows Server 2016 in the domain we’re setting up, we need to select the lowest Windows server version in our environment so that these machines are visible. Since all my machines here are “Windows Server 2016,” I’m not touching the other options.
- Below that, it offers an option asking whether we want “DNS Server” and “Global Catalog.” If you’re creating a domain for the first time, these must be checked.
Global Catalog ensures that everything within the entire FOREST is indexed. This also makes searches and queries happen faster.
A Read-Only Domain Controller (RODC) is a version of a Domain Controller that doesn’t have write access to the database on it. In other words, users, groups, etc. in Active Directory can’t be modified through it.
- At the very bottom, we’re asked to enter a password. We continue by entering a password here.
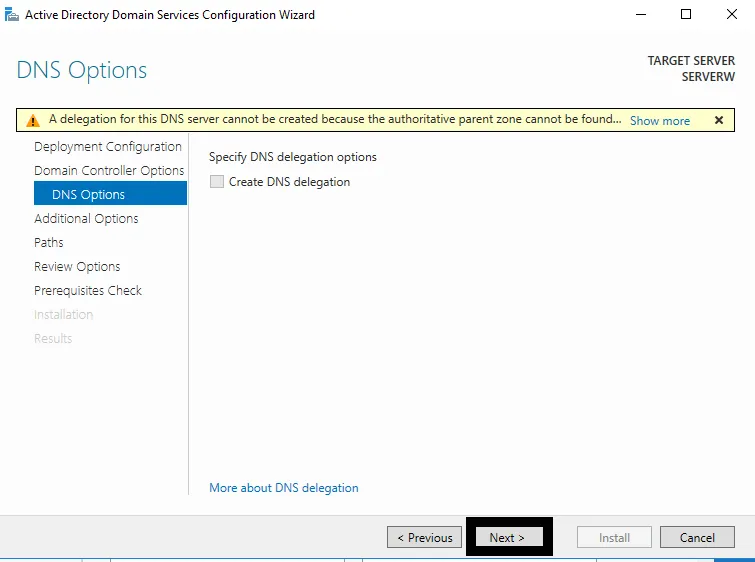
- We get an error message here because our DNS server isn’t installed. Since a DNS server will be set up during the Domain Controller installation, we leave this section at its default.
- On the next screen, we’re presented with the “NetBIOS domain name” screen. We leave that section at its default too. I forgot to take a screenshot of that part, so I wasn’t able to include it.
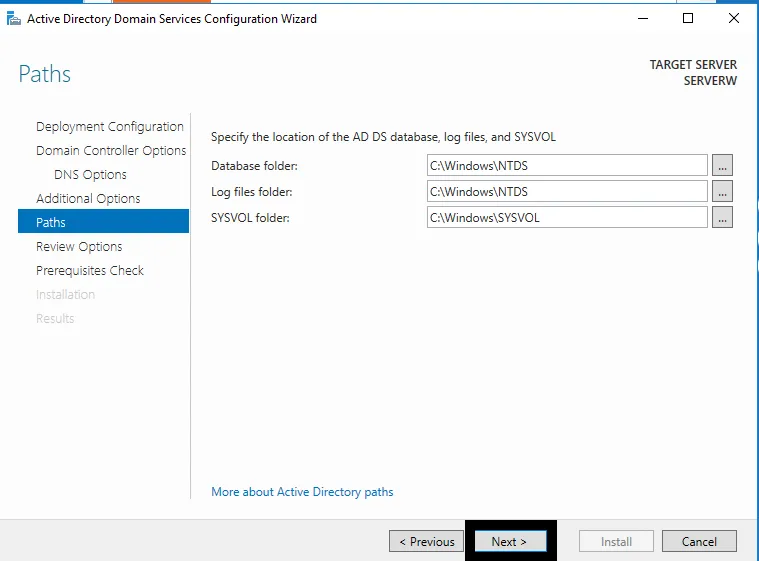
- This section talks about where the directories it mentions will be created. We leave it at the default and move on.
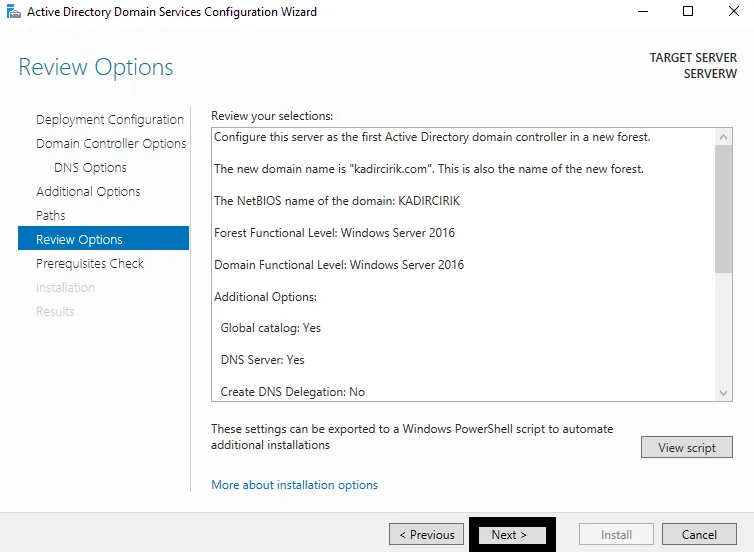
- We’re shown a list of what we’ve done for the Active Directory role. And it gives us information about these operations.
- A prerequisites check is performed here, and it reports that I passed it successfully. And we click Install.
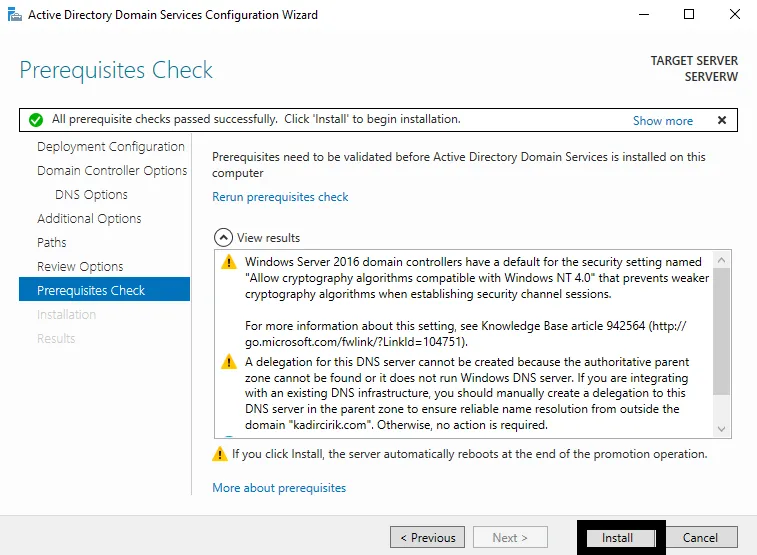
- The installation has started. After this process, our computer will restart.
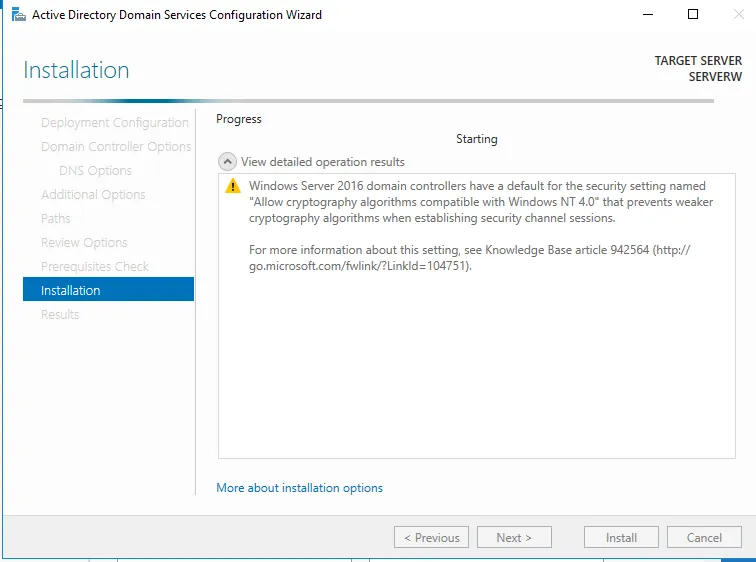
- After our computer restarts, we’re shown that the Domain Controller has been set up.
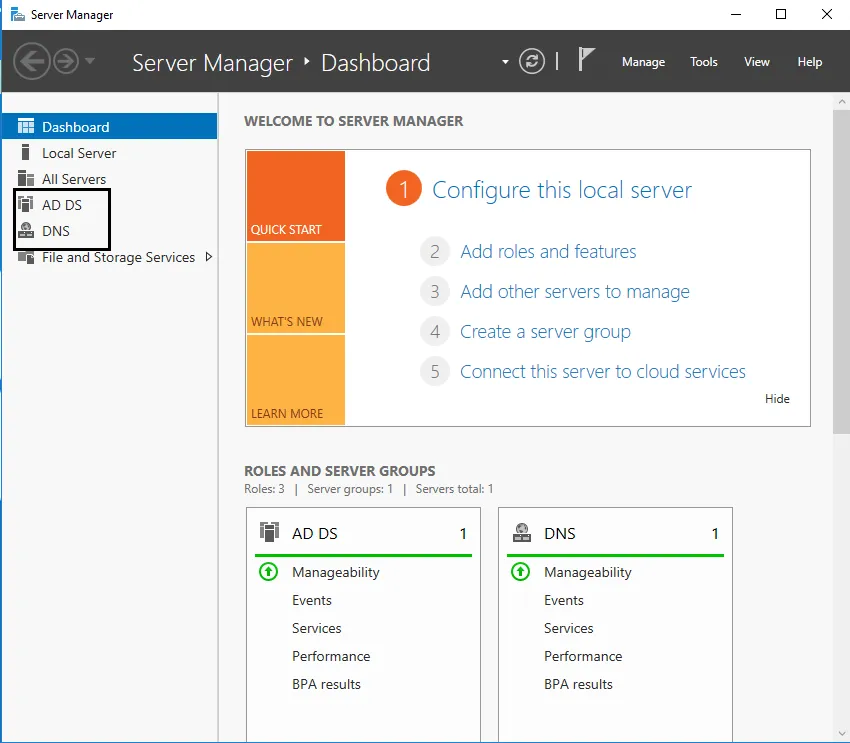
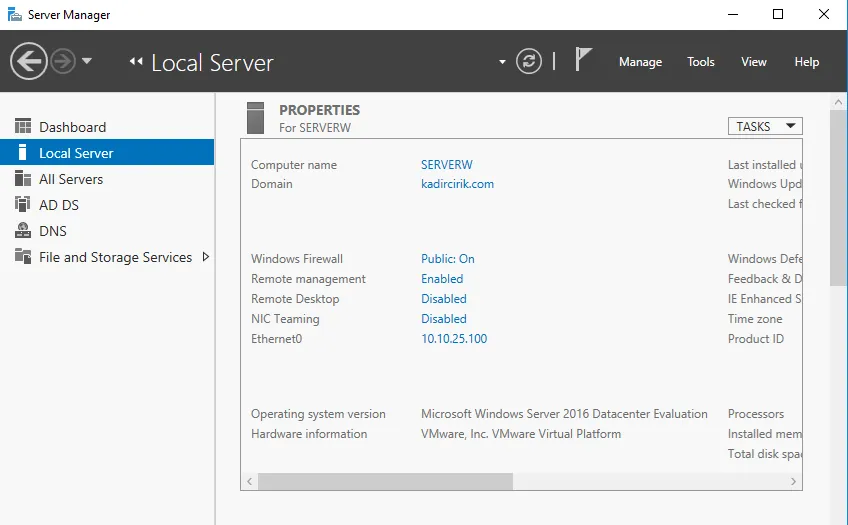
- When I go to the Local Server section, a screen like this greets us. And you can see that the configuration we made has completed.
Thanks for reading this far. :)